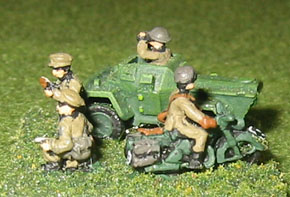
Converting WW2 12mm Models
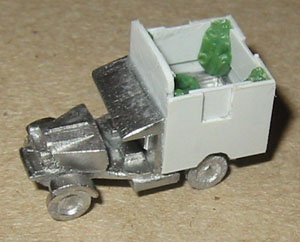
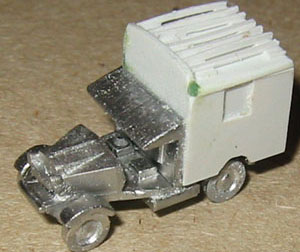
Morris Wireless Van
The Morris 15cwt truck was built in two major versions, the
CS8 and the C4. The CS8 had a 6cyl engine and an 8ft wheelbase. It was
produced between 1934 and 1942 when it was replaced by the C4;
essentially the same truck but with a 4cyl engine. Most were built with
a general service GS body although other body types were fitted such
as:
office, wireless, water tanker, petrol bowser and compressor.
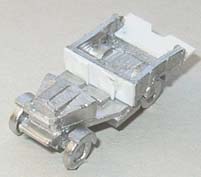
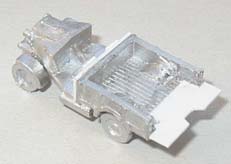
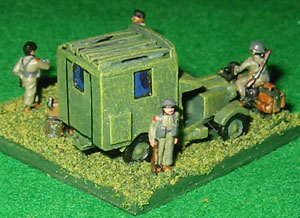
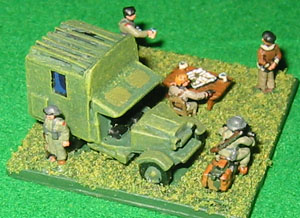
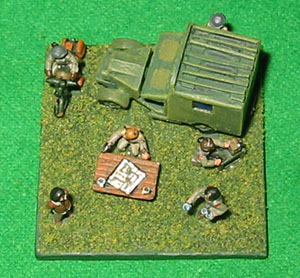
A Morris Wireless Van is the ideal addition to any Britsh HQ.
It was built with a wooden body on the CS8 and with a wooden (Mk I) or
steel (Mk II) body on the C4. No such model is available in 12mm, so I
chose to scratch-build a wireless van body on the back of a Minifigs
CS8
body.
Parts used...
- Minifigs: British Morris CS8 Light Truck
- Green stuff
- Plasticard 0.75mm and 1.25mm
Instructions...
- Build the Morris
- File the sides of the GS body flat so as the improve the
fit for the van body.
- Using 1.25mm plasticard: Add the back of the van body
directly behind the cab; 10mm high and the width of the GS body.
- Round off the top corners of the van front using a file.
- Using 0.75mm plasticard: Cut sides and rear for
the van body, 11mm high and the same width as the existing GS
body.
- Cut windows in the sides and rear, 5mm high and 4mm wide.
- Glue plasticard behind the windows (unless you are planning
on building an interior).
- Glue the sides and rear onto the GS body.
- Use green stuff to reinforce the inside corner joints of
the van body.
- Add a step from 0.75mm plasticard at the rear of
the truch underneath the GS body.
- Using 1.25mm plasticard: Add a roof to the van body.
- Fill in any gaps at the joints in the van body
using green stuff and file smooth.
- Using 0.75mm plasticard: Add two small strips at the front
and at the back of the roof as aerial supports.
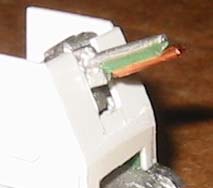
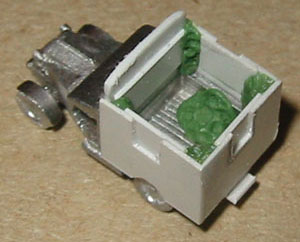
- Create a wireless aerial on the roof by hanging
wires between the supports. I used very thin strips of 0.75mm
plasticard by even copper or piano wire would work.
- Using 0.75mm plasticard: add a folded-down map table to the
rear of the van body's left side..
 |
 |
 |
 |
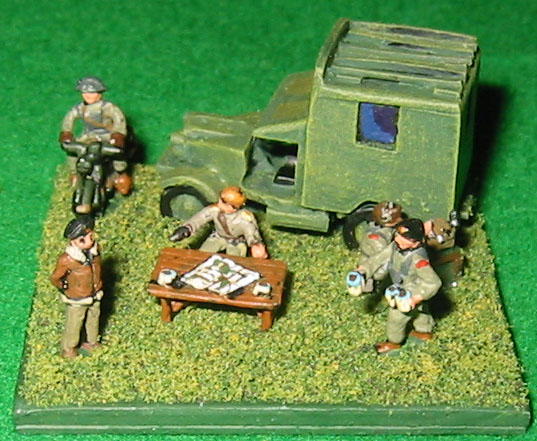
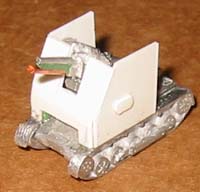
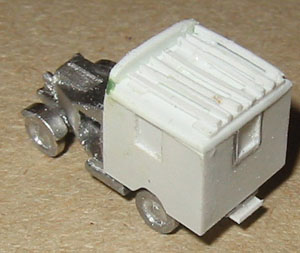
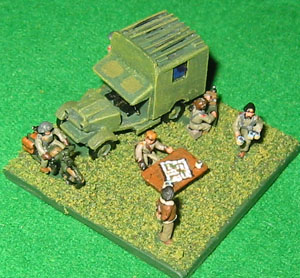
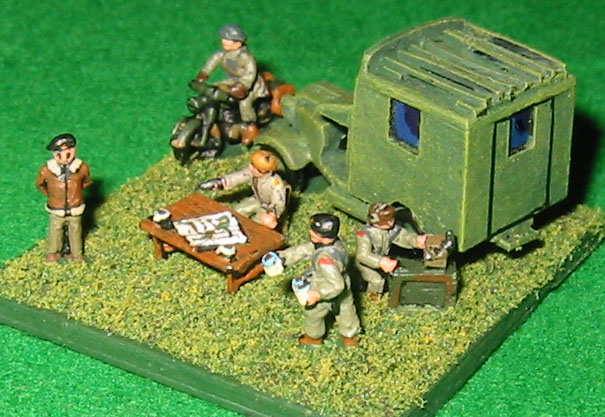
The completed Morris CS8 Wireless Van based together with
Minifigs "Monty, Officers and Camp Guards" and
"BSA Motorcycle". |
 |
 |
 |
 |
 |
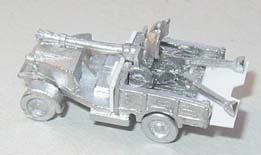
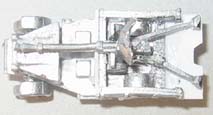
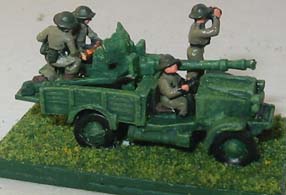
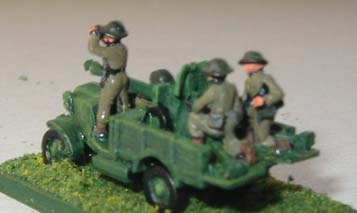
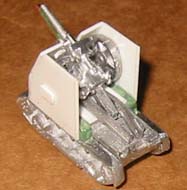
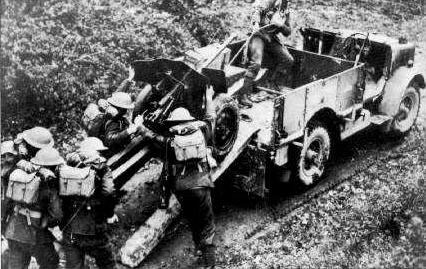
BEF 25mm anti-tank gun
portee in a Morris truck
The BEF in France were equipped with 220 French 25mm anti-tank
guns.
These could not be towed at speed by motor vehicles. The French 3rd
Dragoons started carrying (hence the name portee) them in their Laffly
trucks and soon placing them so that they could fire mounted. This was
soon adopted by other French regiments and even the British
who used the ubiquitous Morris 15cwt truck; even adopting the
French name "portee".
Parts used...
- Minifigs: British Morris CS8 Light Truck
- Minifigs: French 25mm anti-tank gun from Infantry Support
Weapons pack.
- Minifigs: British Crew from 2-pdr Anti-Tank Gun
- Plasticard
Instructions...
- Build the Morris without the cab
- Add a rectangle of plasticard at the back of the cab
- Add two rectangles of plasticard as the seat backs
- Cut away the rear of the truck body
- Add a tailgate made from plasticard
- Cut away the French gunner from the 25mm gun
- Vertically cut away the front of the wheels on the 25mm gun
so that it can be pressed tightly against the front of the truck body.
- Add driver and three crew from a British anti-tank
gun
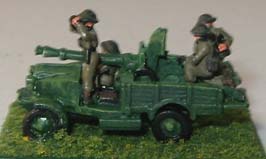
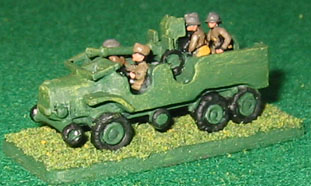
French 25mm anti-tank gun portee in a Laffly S20TL truck
Basically the same conversion as for the British above.
Parts used...
- Pithead: Laffly S20TL Truck
- Minifigs: French 25mm anti-tank gun from Infantry Support
Weapons pack.
- Minifigs: French Loader from 47mm Anti-Tank Gun crew
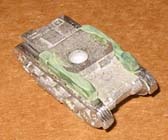
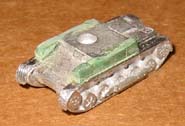
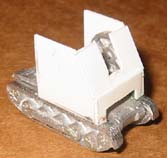
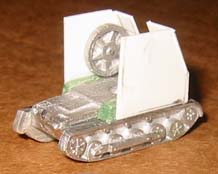
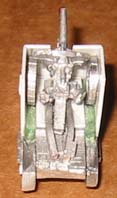
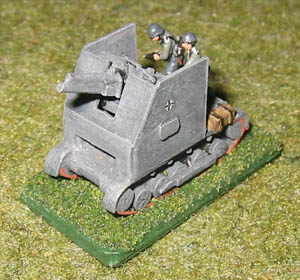
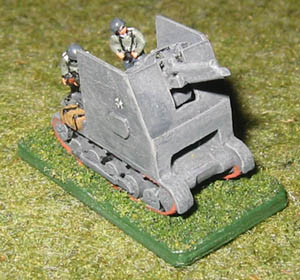
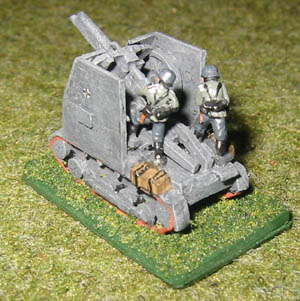
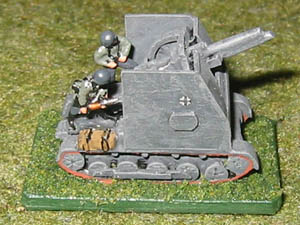
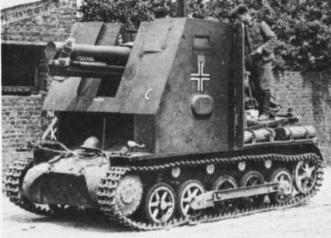
sIG33 auf Panzer I
The sIG33 15 cm L11.4 howitzer was used to give
close support fire to infantry. Although an excellent weapon, it was
found to be too slow and vulnerable
to support the infantry of the Panzer Divisions.
The Sturmpanzer I Bison 15cm sIG33(Sf) auf Panzer I was self-propelled
armoured variant issued to
the heavy infantry gun companies of the Panzer Divisions.
It was made by mounting the gun (complete with wheels and trail)
onto a Panzer I B chassis surrounded by a box shaped gun-shield. It
first saw service in the France 1940 campaign.
Parts used...
- Minifigs: Panzer I
- Minifigs: 105mm Towed Howitzer with Crew
- Green Stuff
- Copper wire
- Plasticard
Instructions...
- Build the Panzer I without turret
- Buildup the sides of the body with green stuff
- Add the superstructure box with plasticard
- Glue the howitzer wheels inside the superstructure
- Glue the howitzer in place
- Modify the gun barrel with copper wire and green
stuff
- Add the crew
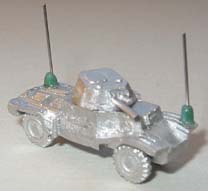
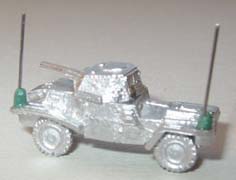
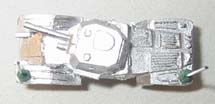
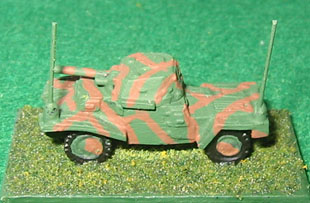
Panhard 178 AMD 35 - Squadron Commander's Vehicle
The normal Panhard 178 was not radio equipped. Radios
were mounted in the platoon commander's and the squadron commander's
vehicles. There was also an unarmed command version with the turret
replaced by a fixed superstructure and carrying three radios.
Parts used...
- Minifigs: Panhard 178 AMD Armoured Car
- Green Stuff
- Piano Wire
Instructions...
- Build the armoured car
- Cut 2 pieces of piano wire each 15mm in length
- Drill a hole in the front of the front left mud
guard (of a diameter to fit the wire)
- Drill a second hole at the back of the rear left mud guard.
- Place a small cylinder of Green Stuff at the bottom of each
wire
- Glue the 2 pieces of piano wire into the holes
Tank Commanders
I wanted to add some tank commanders to my British tanks. As
Minifigs don't make any special tank commander models, I
converted them from an artillery crew officer with binoculars:
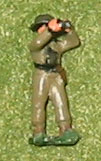
This is a simple five step conversion...
- Cut of the officer's legs at the waist.
- If desired: remodel the helmet into a beret with the help
of a file.
- Drill out the hatch cover on the tank's turret and insert
the commander.
- Make an appropriate hatch-sized circle of plasticard using
a belt
hole punch.
- Cut the circle in half and place in front and behind the
hatch.
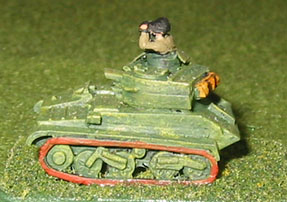
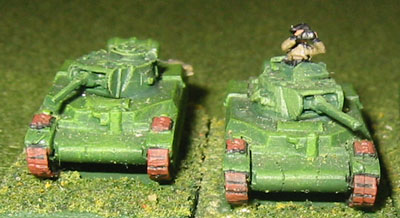
Vickers Mk VI Light Tank:
Matilda II:
Works not just for tanks but even for Dingo Scout Cars:
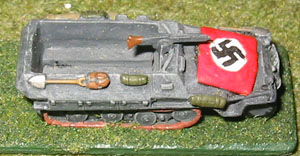
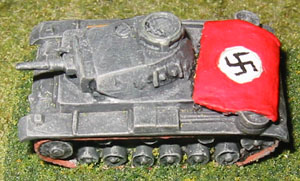
Air Recognition Flags
During the first half of the war, when the Germans had air
superiority, they used
flags on their vehicles for air recognition to avoid them being
attacked by friendly planes.
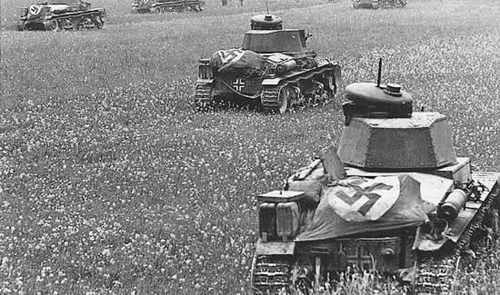
Panzer 35(t) in France 1940
These can easily be made from green stuff. Use a piece of
grease-proof paper from the kitchen and press the green stuff flat
between the paper. The green stuff can then be rolled out to make it
even thinner. Once paper thin, remove the grease-proof paper and cut to
shape. Drape the flag over the vehicle and using a round tool mark the
inner white circle as a guide to painting.

|