Making Rivers
for Kallistra Hex Terrain
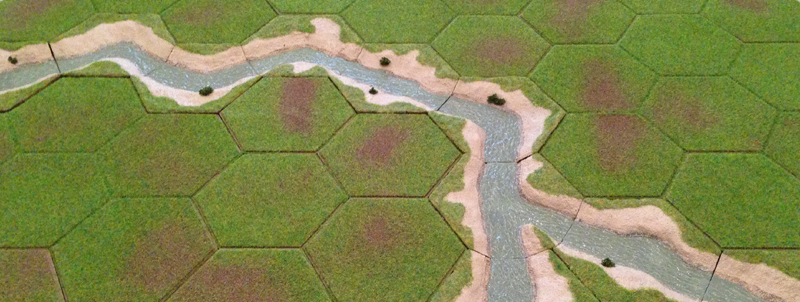
Kallistra make great hex terrain which can be used to play
Command & Colors using miniature figures. They make a selection of rivers, streams and brooks which unfortueately are placed on top of the hex playing board.
I believe that a much better visual appearence is achieved if such watercourses are sunk below the surface of the playing area.
Here's one recipie how to do it.
To get the river at a lower level than the surrounding ground, just use the normal Kallistra hexes but turn them upside down. To get the river to blend in with the surrounding terrain, I gave the areas nearest the edges a base coat of Dulux Salisbury Stone and flocked them with Spring Meadow as described in Kallistra's How To Guides.
Ingredients
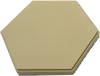
- Kallistra's single brown hexes:
HEXIIS/BR Single Hex Pack - BROWN - 10 pieces plus clips
- N50210 Noch Flock - Spring Meadow - 100g Bag
- Dulux vinyl matt emulsion, colour:30YY23246, Salisbury Stone (However as this isn't available in Sweden so I used the Alcro equivalent instead: NCS S 5020-Y10R).
- Modelling Clay. I used Panduro's Terrakotta Hobby Clay
- White PVA Wood Glue. Best used when new and fresh because it loses its adhesive qualities over time, especially if it has been stored in a cold place such as a garage or shed over a winter period.
- Fine sand - available from any good pet shop.
- Green stuff. (Optional)
- Paint. See below.
- Matt Varnish. I used Panduro Oceanlack
- Liquitex Gloss Heavy Gel
- Noch 95360 Clump Foliage. (Optional)
If you are doing a large number of hexes, using Citadel or Humbrol paints will be very expensive. I went to my local hobby/craft shop (Panduro) and purchased hobby paints much cheaper there. You will need the following colours
- Beige (Sand)
- White
- Leaf-green
- Grey
- Coffee Brown
The ones I got had a satin finish but this doesn't matter as I intend to give them a coat of Matt Varnish.
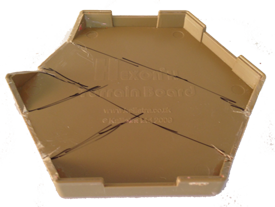
Step 1. Wash the Hexes
Wash the Hexon II boards in warm soapy water, to remove any release agents that may be present from the manufacturing process.
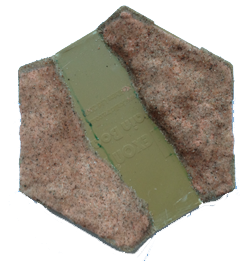
Step 2. Mark Out the River.
Turn the hexes upside down and mark out the course of the river. The hexes are structured in such a way that there is an %quot;obvious%quot; width and entry point in the middle of each hex side.
Step 3. Cut Out the River Entry Points.
With a saw or a sharp knife cut out the river entry points. Make sure that these are the same on all hex sides so that they match up when placed together.
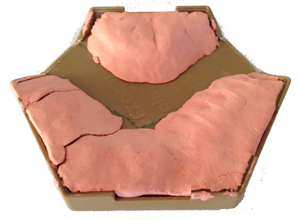
Step 4. Modelling clay
Fill the hexes with modelling clay from the river bank up to the edge of the hexes.
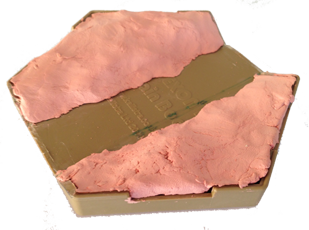
Step 5. Allow To Dry
Allow to dry thouroughly. The clay may shrink slightly and/or crack when dry.
Step 6. Glue the River Banks in place
Glue the river banks in place using white wood glue. It doesn't matter if some small cracks show as these will be covered in the next step.
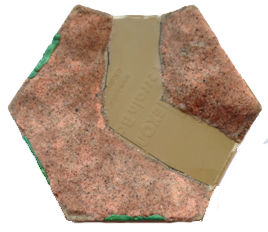
Step 7. Cover the River Banks with Sand
Cover the river banks with white wood glue and then sprinkle them with a coating of fine sand. This should hide any cracks that appeared when the clay dried.
Step 8. Optional - Fill in any gaps at the hex edges
I was a bit sloppy with the modelling clay and the sand - I could have been a bit more careful. There were small gaps at the edges of the river hexes which showed up when they were placed against a normal terrain hex. I filled these gaps using green stuff.
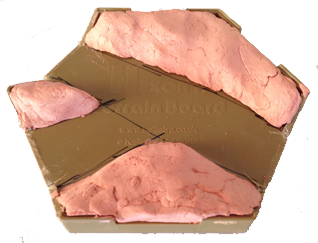
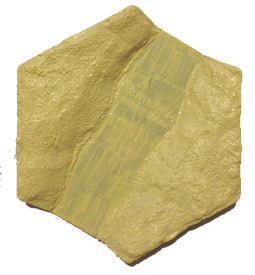
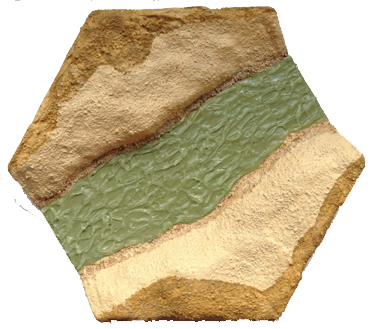
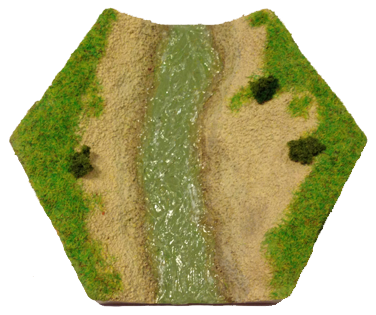
Step 9. Paint sand/beige colour.
Cover the whole river hex in a sand/beige base paint.
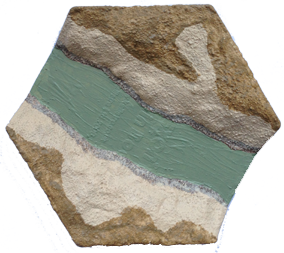
Step 10. Paint the River.
Mix a watery browish colour using a mixture of two parts beige to one part coffee brown and a splash of water. Paint the edge of the river where the bank meets the hex base with a thin line of brown.
Allow to dry and then dry-brush over with beige to blend it in with the bank.
Mix eaqual quantities of leaf-green, medium grey and white and paint the river.
Step 11. Paint under the grass
Paint the areas nearest the edges of the hex a base coat of Dulux Salisbury Stone in order that they will blend in with the surrounding terrain when flocked.
Step 12. Varnish
Cover the whole hex in a coat of Matt Varnish.
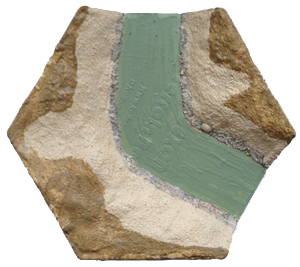
Step 13. Water
Create a water effect using Liquitex Gloss Heavy Gel. Apply quite thickly and work with a GW Sculpting Tool to give a running water effect.
Step 14. Flock
Cover the areas nearest the edges of the hex in white wood glue and then sprinkle with Noch Spring Meadow flock.
Step 15. Optional - Add foliage
Add some small clumps of Noch 95360 Clump Foliage to give the impression of bushes.
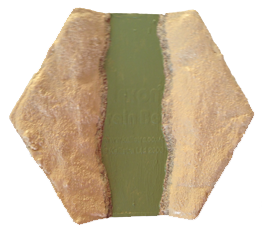
Job Done!
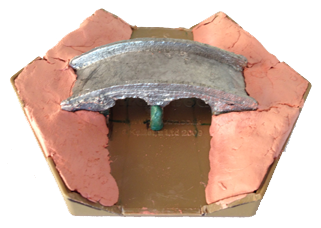
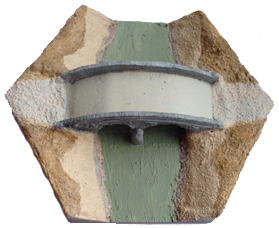
Bridge
Before building up the banks with modelling clay, a bridge can be fixed in place (here a Stone Bridge from Irregular Miniature's 6mm Scenic Range). The bridge was raised so that it was near "ground level" using plastic card and the middle pier was extended down to river level using platic card and green stuff.
On The Table
| 
